Hottest Holiday Fashion Trends

The holidays are just around the corner, and that means it's time to start thinking about your seasonal wardrobe. This year, skip the traditional red and green colors and opt for something a little more fashion-forward. Check out that will keep you on-trend all season long. Check out our top picks below!

Miley Cyrus Sequin Dress

Item #01: Sequin dresses

Sequined dresses are a popular choice for a holiday party! They add a touch of glamour and elegance to any outfit. Simply pair it with black tights and booties or knee-high boots, or go for a bold look by pairing it with gold accessories! The Sequin look is sure to make you red carpet ready! Find your sequin dress here!

Item #02: Black & white outfits with red accessories

In any situation, wear black pants or a classic black skirt with a white blouse and top it off with some festive red accessories to really make your outfit pop. This look is perfect for any holiday event! Snag a cute red purse to add a pop of color here!

Item #03: Metallic skirts and dresses

If you want to add a little sparkle to your holiday outfit, go for a metallic skirt or dress. This trend is especially popular for your next party! It's a great way to stand out from the crowd. For an even bolder look, try this trend with metallic pants!

Item #04: Velvet outfits

Velvet is having a major moment right now, so why not jump on the bandwagon? We love velvet pants, blazers, and even shoes! They'll keep you cozy all winter long. Check out these super cute velvet loafers!

Item #06: Faux fur coats and accessories

Fur never goes out of style, so invest in this timeless staple before it's too late. A faux fur jacket is a great way to translate this trend from winter into the holiday season. Just make sure you aren't wearing the same exact coat as everyone else, so switch up your accessories!

Item #07: Lace Dresses & Skirts

Lace is another popular fabric choice for the holidays. It adds a touch of elegance to any outfit.

Item #08: Plaid pants and skirts

Add some fun pattern mixing to your look with plaid pants or skirts. Pair with your favorite t-shirt and blazer to give a more edgy look.

Item #09: Statement necklaces

During the winter season, statement necklaces are must-haves. You can wear them with almost any outfit throughout this time of year, weatherable at going to a holiday party or just running errands.

Available in a variety of styles, colors, and materials, statement necklaces are a must-have for any fashion-savvy woman.

Item #10: Turtleneck sweaters

The turtleneck sweater is coming back in style this year, and we're totally here for it! A thick turtleneck will keep you warm winter long—perfect for those long holiday office parties or your next family dinner.

We hope you enjoyed this roundup of our favorite holiday fashion trends. What are you most excited to wear this season? Let us know in the comments below! And don't forget to shop our collection of stylish women's clothing while you're here. We have everything you need to get your wardrobe ready for the holidays!

How to Keep Your Hair Healthy in the Winter

The winter is a tough season for hair. Cold temperatures and dry air can wreak havoc on your locks, leading to brittle strands that are difficult to style and prone to breakage. To help you get the most out of the colder months, we've compiled this list of winter hair care tips!

Deep Conditioning Treatments

Conditioning is key to keeping your hair healthy in winter. When the air is so dry, it can be really tough on your locks, leading to brittle strands that are difficult to style and prone to breakage. Start with a deep conditioning treatment before washing your hair (we recommend at least once per week). This will help to replenish any lost nutrients and moisture. You should always be sure to apply hair products from root to tip, rather than concentrating them on the roots only – this will ensure that your hair is fully coated and will be less likely to break.

Keep your hair hydrated with a hair mask! Shea Moisture products are good for every hair type from color-treated hair and flaky scalp to natural hair and split ends! Add a little Shea Moisture to your winter hair care routine!

Blowouts

For winter, it's best to keep your blowout basic. Instead of adding extra heat styling tools like curling irons and flat irons into the mix, stick with simple straight styles that won't cause any damage or breakage. Then you can go in with a flat iron or curling iron as needed for a special event or change up your look.

Be sure to use a heat protectant spray when styling your hair, and avoid using the highest setting on your blowdryer – this will help to minimize any damage that can be caused by winter weather. We personally LOVE Color WOW Anti Frizz Spray. This stuff is a MUST TRY!


Limit Shampooing

The winter is when you can really get away with using dry shampoo on your hair every couple of days. It will absorb excess oil and dirt without causing any damage or stripping out natural moisture from your locks. Just be sure to remember to use a nourishing conditioner after you shampoo so that your hair is fully replenished.

Use Protective Styles to Help Avoid Heat Damage

When winter rolls around, it can be tempting to style our hair in protective styles until things warm up again outside. The winter months are when we really appreciate braids and extensions! Braiding or adding extra hair will help to protect your hair from winter damage, and you can always go in for a quick retouch whenever needed.

In the winter months, it's best to avoid heat styling as much as possible so that there is no need to worry about additional breakage or dryness caused by heated tools. It may seem counter-intuitive but sacrificing a little bit of styling time now can help to ensure a healthier scalp for the rest of winter and beyond.


Use volumizing products or techniques while styling

The winter can also be a time when your hair lacks volume. If you’re looking for some extra oomph, try using volumizing products or techniques while styling. This could mean adding mousse before blow-drying or teasing your hair at the roots before adding some finishing spray.

Use softer bristled brushes when brushing your hair

Since winter is a time when static electricity is more common, it’s important to use the right tools when brushing your hair. Try using a brush with softer bristles – this will help to dissipate the static and keep your hair healthy. If you are a curly girl, remember to always brush with wet hair and leave-in conditioner!

As curly girls ourselves we LOVE the Wet Brush brand.

Don't Forget - You Are What You Eat!

Using all of the right products and limiting heat is only half of the battle - You also have to fuel your healthy locks from the inside! Healthy foods are just as important as hair washes and hair masks.


We hope you find these winter hair care tips helpful! Take a self care day to focus on your hair health, create a balanced diet, and remedy those winter hair woes. Be sure to follow us on social media for more advice and product recommendations. Happy winter!


The 12 Days of Christmas Movies

The Christmas season is a time for family, friends, and Christmas movies. Christmas movies have been a staple of the holiday season since the 1940s when they began to be televised on Christmas Eve. From "A Christmas Story" to "It's A Wonderful Life," these classics are sure to bring back fond memories from Christmases past. In honor of this year's 12 Days of Christmas Movies, we've compiled a list of some popular favorite movies of all time that you can watch or purchase on Amazon Prime that the whole family will love!


"Miracle on 34th Street"

Miracle on 34th Street is a holiday classic, and its enduring popularity has inspired multiple remakes. A young department store Santa Claus must convince the world that he's the real thing in this 1947 film starring Edmund Gwenn as Kris Kringle.

Kris helps an unhappy mother find her Christmas cheer when she visits his toy shop.

This is a great Christmas movie! I love how it makes me feel all warm and fuzzy inside when watching this film during Christmas time. It's a must-see every year to capture the holiday magic! If you want to watch Miracle on 34th Street, click here.

The Miracle on 34th Street


"It's a Wonderful Life"

It's a Wonderful Life is a beloved holiday movie that tells the story of George Bailey, who has spent his life trying to serve others in order to make up for an incident he wishes never happened. When Mr. Potter tries to take over Bedford Falls and turn it into "Pottersville," George must enlist help from friends and family in order to save Christmas for his town.

It's A Wonderful Life


"A Christmas Story"

A Christmas Story is the tale of young Ralphie Parker who desperately wants a Red Ryder B-B gun under the Christmas tree, only to be told he'll shoot his eye out by everyone around him. Along with friends and family, this classic movie follows all of Ralphie's Christmas dreams, even when he doesn't get the gift he was hoping for.

A Christmas Story


"Elf"

Buddy (Will Ferrell) is a human who accidentally gets taken in by Santa Claus and raised as an elf at the North Pole. When Buddy learns that his father is on the naughty list and is about to be deported, he sets out for New York City in order to save him. Elf is a heartwarming Christmas classic that will make you laugh and cry - and believe in the magic of Christmas all over again.

Elf


"The Muppet Christmas Carol"

The Muppet Christmas Carol is a family favorite that captures all of the Christmas spirits. It tells the story of Ebenezer Scrooge, a cold-hearted old man who is visited by three ghosts on Christmas Eve in order to teach him about Christmas and the true meaning behind it. This movie has become a classic, with many versions available including one narrated by Michael Caine himself!

The Muppet Christmas Carol


"Home Alone"

Home Alone is a Christmas classic that follows the story of a young boy Kevin McCallister, who accidentally gets left behind when his family goes on vacation. When two burglars try to rob his home, Kevin must use all of his cunning and resourcefulness to outsmart them and save Christmas. This movie is hilarious and shows that Christmas is the time for family and love! You can watch Home Alone on Amazon or buy it here if you want to own a copy.

Home Alone


"The Santa Clause"

When Scott Calvin (Tim Allen) accidentally kills Santa, he must step in as Christmas's newest hero. He learns how to fly reindeer and deliver Christmas presents, all while trying to keep his son from learning the truth about Christmas. This family favorite is both heartwarming and funny - just like Christmas itself!

You can watch The Santa Clause on Amazon. And if you want to own a copy of your very own, click here!

The Santa Clause


Honorable Mentions

  • A Very Murray Christmas

  • Mickey's Christmas Carol

  • Nightmare Before Christmas

  • National Lampoon's Christmas Vacation


This holiday season, we’ve compiled a list of our favorite classic Christmas movies. A lot has changed in the world and more than ever before, people are looking for nostalgia to get them through these difficult times. These films offer that familiarity with cheer and good tidings that remind us what it is like to be surrounded by friends and family during such an important period of the year. We hope you enjoy these classics as much as we do! What is your go-to movie? Let me know in the comments below!

Holiday Gifts for Every Budget

The holiday shopping season is upon us! No matter your budget, you can still surprise and impress your loved ones this season with the perfect holiday gift!

The holidays are supposed to be about spending time with those we love. But as the bills stack up over the winter months, it's easy to find yourself strapped for cash as you start shopping around for presents and you might get stumped on gift ideas. But don't worry, we've got you covered! Here is a holiday gift guide for affordable gifts and stocking stuffers for every budget.

For the Budget-Conscious

If your funds are tight, consider giving gift cards from stores, restaurants, or even a gas station. The person receiving them can choose what they want when it's their time to buy making this the perfect gift! While small, these are practical, perfect stocking stuffers sure to please the whole family! Check out the links to these other cute and affordable stocking stuffers!

For the Self-Gifter

Don't forget about you this season! Treat yo' self! Whether it's a gym or yoga membership to uphold your New Year's resolutions or a bottle of wine! Always remember to give back to yourself this holiday season!

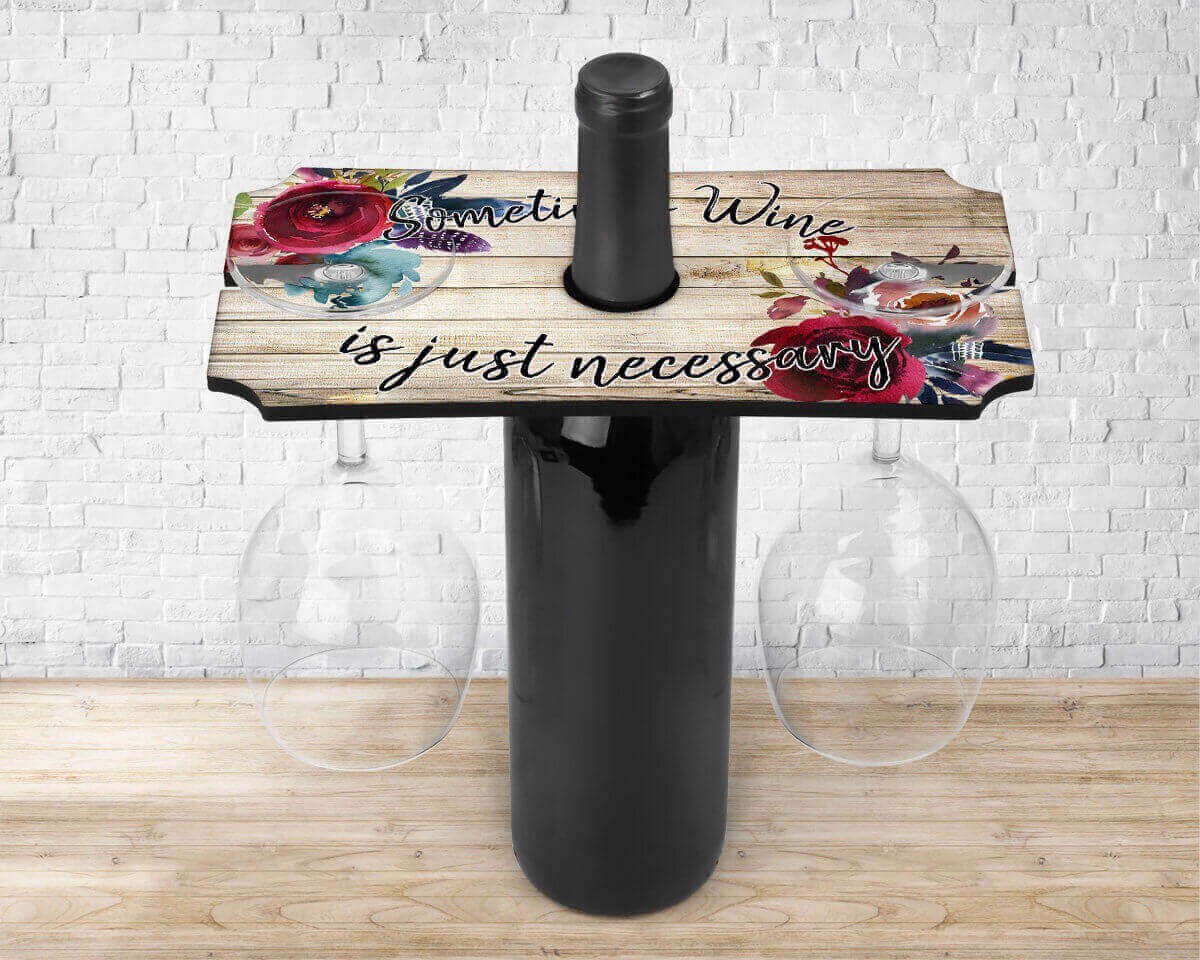
SOMETIMES WINE IS JUST NECESSARY WINE CADDY - CUSTOM MADE DRINKWARE ACCESSORY - GIFT IDEA

For the Foodie

If your friend or loved one loves cooking, consider giving them a subscription to a food magazine, such as Taste of Home or Good HouseKeeping. They'll get recipes from award-winning chefs, helpful tips on making any meal taste better, and stories about local restaurants.

For the Homebody

Have family or friends who like to stay in? They would probably appreciate having a gift card to their favorite take-out restaurant, or Netflix subscription. This way they can sit comfortably at home and enjoy some "me time". You might also consider "smart home" gifts and tech gifts such as an led lights or wireless charger to make their nights in more enjoyable!

For the Outdoorsman

For the outdoorsy type, perhaps an portable outdoor cooking kit, yard games or a JBL CLIP 3 - Waterproof Portable Bluetooth Speaker for Christmas! They'll have everything they need to entertain, survive and cook up their favorite meals while enjoying the fresh air.

Splinter Woodworking Co. Yardzee, Farkle & 20+ Games (All Weather) - Yard Dice Game Set with Red or Green Collapsible Bucket, Lid, 5 Big Laminated Score Cards & Marker

There are many ways you can make this holiday season even more special! You don't need a lot of money or time on your hands to get people excited about the gifts they receive. Frugalfashionista.biz has some great gift ideas for all budgets; Custom pieces and holiday specials. Don't forget that supporting small businesses and small business owners is important too! Fast and free shipping!


Don't Stop Box

Last week I did my first live unboxing video on Facebook.  It featured the Don’t Stop Box, which is the most recent new arrival to the website.  If you missed the video you can check it out here. I’m pretty excited about this particular box. A great deal of thought was put into creating the box, and I wanted to share that in more detail here where I can express myself a little better than in a rushed live video. 

The Don’t Stop Box is $35 which includes shipping to anywhere in the US.  This box is focused on inspiration, building strength, and of course looking good while you do that.  For $35 you will receive a total of 24 items which are listed below:

               24oz Water Bottle

               Don’t Stop Tshirt

               15 Affirmation Cards

               1 Traditional Style Scrunchy

               5 Telephone Cord Style Scrunchies

               1 Surprise Gift


It’s the beginning of a new year, and with that many people traditionally create resolutions.  Often those resolutions involve diet and exercise.  I felt that many of us may have set goals in those two areas more this year than any year before. I don’t know about you, but quarantine added a few pounds for me.  If you fit into this category then this box is perfect for you.  All of the items should help you along your journey to a healthier year.  The water bottle has been customized.  On the front, it says, “Drink your effing water”.  While on the back you will see guidelines on where your water consumption should be for different times of the day.  Staying hydrated is so very important, and with this water bottle, you will be reminded every time you look at it to DRINK YOUR EFFING WATER! 


153198368_2910788162486498_6631296765447062400_n.jpg

The shirt is very soft and has been customized to say DON’T STOP.  This simple expression can make a lasting statement on many levels.  Make this your favorite workout shirt and you’ll be reminded to keep going even if you get tired or feel that a task is too difficult.  Every time you wash and fold this shirt you’ll be reminded and should reflect on whether or not you have given up on your goals.  The most important suggestion I have for this shirt is to wear it out in public.  This message could be just the thing a person might need to see on a tough day.  Imagine walking past a stranger, they look up and catch a glance of your shirt and the words DON’T STOP strike them as a message that was meant for them to see in that specific moment.  The world is a difficult place and if a simple t-shirt can help someone then it’s well worth the price.


153018922_434741237797020_1782385517906743760_n.jpg

I designed each of the 15 affirmation cards with hopes that everyone will find inspiration and receive the push they need to get through their day.

This box is a one-time purchase. There are only 20 boxes available and then they will be sold out. If you would like to purchase one you can do so here. If you have any questions feel free to contact me and I’ll get back to you as quickly as possible.

iPad Pro Journey Combined Days - Using Procreate As a Beginner

By Toni Hetrick

I’m a little behind on posting each day’s experience with my new iPad Pro.  Worry not, I have continued drawing each day, I just haven’t had the time to create a blog post each day.  I have decided to consolidate a few posts into one to bring you up to speed.  

On day 3 of drawing, I started off by again spending a little time experimenting with different brushes.  I did this by selecting a brush and seeing what effect it gives off when in use. I am still in awe with the number of brushes that come with the Procreate app.  I’m happy that as a beginner, at least so far, I have been able to follow tutorials using the brushes that I already have without having to purchase anything additional.  After taking a few minutes experimenting with the brushes, I moved onto YouTube. 

During my search I came across a tutorial from Holly Pixels: “Bullet Journal Doodling in Procreate How to Draw a Pencil”.  This kind of tutorial is right up my alley for multiple reasons. First, it wasn’t an incredibly long tutorial and the image seemed simplistic enough. Since I’m new to this, I feel it’s best to learn the basics before tackling a very difficult tutorial and feeling defeated. Also, I am very interested in creating images that will work well as stickers to include in orders for my business.  This is something that I have only been able to do a few times because I have been purchasing from companies where you must place a minimum order of let’s say 100 stickers. It’s rather expensive, and then you are stuck with 100 of the same exact sticker.  Words cannot express how excited I am to be able to do this on my own.  

The tutorial went smoothly.  She does a great job explaining the process.  I don’t use a bullet journal; however, I do use a planner and am happy that I’ll be able to create my own stickers to use.  Even though this was a very simplistic tutorial, I believe this was the first time where I made a light sketch in pencil and then created another layer to create a bold outline of the shape that would be used from that point on.  This is as simple technique that will be used for several drawings in the future. I was satisfied with the end result and plan on following Holly Pixels to try more of her tutorials.  

Here’s my finished product. :)

Here’s my finished product. :)

The finished product.  :)  Looks yummy.

The finished product. :) Looks yummy.


After successfully completing the pencil tutorial, I was pumped and craving more.  I headed over to Art with Flo’s channel and chose one of her tutorials. This time, her tutorial, “ANYONE Can Draw This DONUT in Procreate”, caught my eye.  Her tutorials are great and I’m happy that I found this one. If you are new to procreate I strongly suggest that you check out her channel. It was fun and I learned new techniques on how to achieve different shading and depth perspectives.  Without this tutorial, I can say I don’t think I could have created something like this on my own, at my current level. If you haven’t already picked up on this, I am a huge fan of tutorials.  It’s absolutely amazing the amount of information available for free. Below is the exact tutorial I followed. To the right is my finished product. I foresee many donut creations in the future.

Again thank you for visiting the blog. If you enjoyed this tutorial please click the heart below to show some love. Stay tuned for future blog posts following my new digital art journey.

iPad Pro Journey Day 2

It’s day 2 of my iPad journey. Initially, I messed around with the different styles of brushes that come with the Procreate app.  At some point I want to develop good hand lettering skills, if possible, so I dabbled with some of the calligraphy pens. I’m definitely going to need lots of practice.  After that, I decided to follow another YouTube tutorial. This one by Art with Flo caught my eye as this style of art is very popular right now. I grew up loving cartoons and comic books so if I can get the hang of this style I will use it often.  

91912347_2723044344488435_3580732239178104832_n.jpg

I chose to use a picture of my stunningly beautiful sister as the base/reference for this project.  Unlike me, she is a cosmetic genius. I look forward to her Instagram posts, to see what glamorous look she’s created for the day.  If you are interested, head over to Instagram and follow her for makeup suggestions. You can do so by clicking here. Anyways…..back to this drawing. At the beginning of the YouTube video, she instructs you on how to choose a well-lit image with clear, crisp quality especially of the eyes.  I felt that this picture would work well. The only downside to my image selection was the flyaway wisps of hair, but for now, I’m willing to overlook that and learn.  

I agree with the creator of the video when she says that you can complete this without being able to draw.  This was really mostly tracing, which I’m not sure about you, but I find it very relaxing. I felt the video had a decent pace.  I had to pause it a few times to complete a task to my liking and then would start it back up for further instruction. Since I’m so new to this, I find that the areas where I’m having to replay and pay closer attention are when a new brush is selected and detailed instruction is not given on exactly what category that brush is under.  Or sometimes a new layer will be added and placed somewhere and it’s done just a little too quickly for me to see if there are multiple layers. But with the magic of technology, it’s easy to back up and replay what I’ve missed. That makes the learning experience stress free.

Overall, I feel I was able to follow the instructions well.  My sisters’ hair is very dark so I didn’t mess with very many variances in color streaks in the hair to give it that crazy comic pop.  I may go back later and experiment further. The example the video provided added white streaks in the hair. Initially, I followed that instruction but I didn’t care for that look so I duplicated that page and removed those streaks to see which I liked better.  I think I prefer the one without the white. My sisters’ shirt has detail in it that I will likely go back and work on as well. This was not something that was instructed in the video; however, I would like to test my skills at airbrushing the shirt to give more of a cartoon effect.  I enjoyed this tutorial and look forward to following her YouTube page.  You already saw my reference picture above, now below you’ll find the two finished products. What do you think? Feel free to drop a comment below. As always, thank you very much for stopping by the website. If you enjoyed this post please click the heart below to show some love. Stay safe and healthy.

91792531_531700287490058_1599459607875420160_n.jpg
92052760_528595038054923_4318000763226816512_n.jpg

iPad Pro Journey Day 1

Over the last 6 months, I have worked very hard and have been very blessed with sales. That work has allowed me to achieve yet another goal for my small business….purchasing an iPad Pro.  My reasoning behind setting this goal was, with an iPad Pro and some additional software; I will begin the journey of learning how to design my own graphic images.  I already make simple designs using silhouette software, but I’m always looking to step up my game and excel in any way I possibly can. In addition, I used to LOVE to draw. I was actually quite good at it.   However like with many things in life, I got older and busier and didn’t set time aside for drawing. Getting back to drawing will allow me to love my small business even more by creating pieces of unique digital art that can be displayed in many ways.  I’m hoping that as I move along in this learning journey, I can share my experiences with you. Perhaps you are a beginner as well. Perhaps you are considering the same type of purchase for similar reasons, or maybe you just need some entertainment. At any rate, I’ll try my best to share my journey with you.

ipad.jpg

I was in luck that the new 2020 iPad Pro was just released and was on sale.  I purchased from Amazon and approximately 4 days later, this 12.9-inch beauty arrived at my doorstep.  I also purchased the Apple Pencil from Amazon. It shipped and delivered in 2 days. Praise Amazon Prime! Not going to lie, unboxing the iPad made me feel like royalty.  Nerdy vibes were high that day. The crisp white packaging, simplistic yet modern, stole my heart.  

I am already an Apple user, which made setup incredibly easy.  There were just a few simple steps to follow, after which the iPad was able to connect to my iPhone and that was basically all she wrote.  There were a few steps that I choose to skip over like setting up Apple Pay, etc. I don’t feel that I will need those, and if I do, they can be updated at a later time.  Once everything was up and running, my next step was to install an app called Procreate. Why Procreate? After much research, I feel that Procreate is a very popular tool that several designers use.  It appears to be user friendly and there is plenty of tutorials available online. The best part is the price. It’s just $9.99. From what I understand if there are any updates that are made after your purchase, that update is included in the $9.99 fee you have already paid.  I priced other software companies and this was a great deal less expensive.

YouTube Tutorial.jpg

My first project was a guided YouTube tutorial from Art with Flo.  I chose this video because she starts off by saying, “Anyone can draw this”.  I took that challenge and was pleased with the end result. I did have to stop the video and replay in different sections, as I felt she went too fast for me as a first time user.  The only spot that I hit a snag was when I needed to download the two free brushes from her website (thank you for that btw) and get them installed onto the iPad. I ended up installing them on my laptop and moving them over to dropbox.  I then opened the Dropbox app on the iPad and easily installed the brush by just clicking on the file I wanted. I should have timed myself on this first drawing, but unfortunately, I did not think of that. For the very first project, I would say it went well.  I have put my finished product below for you to see. I plan on trying more of her tutorials to continue to learn the app. I have also posted links below for the iPad Pro and Apple Pencil. As always thank you for visiting the website and reading the blog. Feel free to leave a comment below and if you enjoyed this post please show some love by clicking the heart below.

91764957_218051572738646_9162253471116689408_n.jpg


Tips For Small Business Owners Part Six: Don't Sell Yourself Short

By Toni Hetrick

If you are looking to run a successful business then you want to make sure that you are valuing your business appropriately.  It’s a common mistake to get caught up in the excitement of starting a business, and forget to sit down and really do your homework before diving in, head first.  It’s truly necessary to whip out the calculator and determine as accurately as possible what your total expenses are, in order to price a product for sale.  In the simplest of terms you want to make sure that you are turning a profit.  Remember your goal is creating a business, not funding a hobby.

You may have a natural business sense and find this post a little dull, but many people struggle with this for various reasons.  There are many people out there that fall in love with a business concept and don’t actually sit down to do the math to ensure they are pricing their products appropriately.  There is an overwhelming amount of information to research when starting a business, because of that, let’s look at a small scale business idea.   Imagine this scenario…..Sandy starts making jewelry.  Initially she makes some for herself and a few friends.  Before she knows it, she’s getting compliments everywhere she goes.  She can’t believe how people LOVE her jewelry.  Many admirers tell her she should sell her jewelry.  She’s quickly swayed into thinking this could be a lucrative business.  She rushes to the local craft store, stocks up on supplies and gets to crafting.  Sandy is filled with excitement and pride that people actually want to wear the jewelry she is making.  She takes a bundle of freshly made jewelry into work, her coworkers flock in like a pack of hangry seagulls.  The next thing she knows she’s overwhelmed by questions of, “how much for this one”, “oh and how much for these”.  She quickly answers $5.  In her mind she’s thinking it didn’t take her that long to make and that $5 is a fair price.  When in reality she has no idea how much it actually cost to make that specific bracelet.

Sandy may be fine with that price point, or she may have just made a mistake that is rather hard to recover from.  My suggestion is to try to contain that excitement and research before, like Sandy, you start quoting prices.  That research would include several aspects, but for the purpose of this post we’ll focus on pricing.  Unfortunately there is no one method on how to price products.  Personally I feel the most important task is to know your costs.  By costs, I mean the cost of ALL materials and labor, basically everything it took to make that product.  To break that down even further, if you are making a beaded bracelet you should figure out how many beads come in the pack and then how many beads it takes to make each bracelet. Use that to calculate the cost of each individual bracelet.

Next is a very difficult part, determining what you feel you need to make from that product.  Keep in mind, you may not make a huge profit off of one single item, and the profit will vary from one product to the next.  Sandy may have spent $100 total at the craft store on supplies.  She’s not going to make that $100 back on one piece of jewelry, but she will need to look at each piece of jewelry the amount of materials used to help determine a price for each and every item.  By the time she is done there should be a profit on that total $100 spent.  Depending on the type of product you make there is a reality that some things you just can’t recoup financially on the amount of time it takes to produce an item (EX: Quilting, Knitting, etc.).

While researching, get to know your competition.  Chances are, unless you offer something that NO ONE else does, your customers will compare pricing with the competition before purchasing.  You also need to have a good feel for the market in your area.  In some places, the market is much higher and you’ll see items selling for considerably higher prices than what you can seem to sell for in your area.  There’s definitely a learning curve with this.  You may need to adjust as time goes on, but it’s a fine line to walk.  You don’t want to undercut your prices and take a loss from the beginning, but you also don’t want to be so overpriced that people are steered away from your company for good.  Fortunately in today’s age it’s possible to do a little market research easily on social media for FREE.  You could always post examples of some of your products and ask or take a survey asking if people would feel comfortable paying however much for it.  This should help to some degree. 

I also want to caution you as far as offering discounts to people.  It’s very tempting to do, but I say BEWARE!!  If you sell someone an item at “cost”, or even take a loss on the item just to be nice, many times they will expect to get everything at that price and for all eternity.  You might be ok with that, and that’s completely fine.  I just offer cautionary advice because it can get overwhelming and it’s really hard to then raise prices and have to explain why later on.  Believe it or not, even close friends or family members can get huffy when they suddenly are expected to pay for something.  Crazy I know, but I’ve heard so many people complain about this.

I’m sure your head is spinning at the thought of all this.  Just know that you aren’t alone.  We’ve all been there.  If you have any questions feel free to comment below, or send an email.  If you liked this post please click the little heart below to show some love.  As always thank you for visiting the website. 


Tips For Small Business Owners Part 5: Getting Through Your First Vendor Event

By Toni Hetrick

Celebrate

So you’ve booked your first vendor event.  Congratulations and welcome to the vendor family!  Now what?  The more prepared you are, the better off you’ll find yourself.  Confirm with the event coordinator the size of the space you’ll be provided, and whether or not a table(s) and chairs will be provided.  In an earlier blog post I covered what tables and table coverings I use.  If you missed it you can find it here.  You will also want to confirm the start and finish times of the event.  Many times if the event starts at 9AM for the public to enter, then vendors will be allowed to set up earlier, like 7AM for example to set up.  There are many times that early breakdown is prohibited so keep that in mind and confirm as well.  These are a few simple questions to ask that will help you prepare greatly for the day of the event. 

Often baskets or specific items are raffled off at such events and as a vendor; part of your fee is a donation for the raffle.  You may be responsible for a basket of items or just one item that meets at least a minimum value set by the coordinator.  Make sure you confirm this, as nothing is worse than getting to an event and realizing that you were supposed to bring a basket and you don’t have one.  Remember the item you provide is a great way to earn a new customer.  You’ll want to put something together that highlights your company and what you have to offer.

Is this event themed?  If so you may want to target the merchandise you have available at this event to go along with the theme.  If there is no particular theme, perhaps there is a holiday approaching that you could gear a few items towards to help gain some sales.  At times it’s nice to offer a sale, package deal or coupon for the day of the event as well. 

Email Marketing

If you’re working on building a mailing list, this is an opportunity to grow that list.  There are multiple tactics that can be used to obtain client email addresses, but one that I find to be very successful is doing a giveaway at a vendor event.  Have your own personal giveaway in addition to whatever the event coordinator has planned.  This giveaway would be held specifically at your booth, and the items would be just from your company.  It doesn’t have to be anything significantly large, but something to draw attention, people love winning something.  In order to enter to win, part of the information people must provide is their email address.  I make sure to either explain or have it posted on the giveaway that they will be joining our mailing list. 

How will you take payment for the items you sell that day?  If you don’t already have a method of accepting credit/debit cards, I strongly suggest getting an account set up.  I used PayPal for years; however I recently switched to Square.  I was happy with PayPal, however my website host (SquareSpace) partnered with Square, and it was in my interest to make the transition to Square.  Naturally, there will be people who pay in cash, so make sure that you have money there to make change.  Bring plenty of ones.  The time you only have a few ones, you’ll have people paying you with bigger bills all day long and you definitely don’t want to lose a sale just because you couldn’t make change. 

Pack some snacks!  It’s possible that this is going to be a very long day.  Between loading your vehicle, driving to the event, setting up, lasting through the entire event, packing up and driving back home, you will more than likely be exhausted by the time the day is over.  Some events are large enough to have food and drinks, while others will not.  You want to make sure you have some snacks packed to keep you energized throughout the day.

As you can see there is a great deal that goes into presenting your business to the public at vendor events.  These are just a few of the things you will need to think about before your first event.  I hope to provide additional tips in future blog posts.  Until then, I hope you found this post helpful.  As always, thank you for visiting the website.  If you enjoyed this post be sure to click the little heart icon below, to show some love. 


Tips For Small Business Owners Part Four: How To Handle Creeping Competitors

By Toni Hetrick

I’ve spent considerable time deciding whether or not to write this post.   This topic arises frequently in different social media groups that I belong to, and from what I see, the stances vary.  Initially, when I see someone’s post they describe the way in which they’ve been approached and then ask for advice on how to answer/handle such situations.  I’ll take this opportunity to voice my opinion for what it’s worth, and offer you the reader, the opportunity to open conversation on the topic in the comments below. 

First I’ll provide an example so that you know for sure what I’m speaking of.  Imagine that you are a crafter.  Your specialty is anything vinyl (t-shirts, signs, decals, etc).  When you decided to begin your business, you spent a significant amount of time researching all the avenues of the business.  You have money invested in equipment and merchandise and have learned from your own successes and failures.  Yes, you viewed hundreds of hours of youtube tutorials, but you performed those searches on your own, you didn’t simply ask someone, “hey how do you do this?”  Now imagine you are approached by someone and they blatantly tell you they want to start a business doing the same exact things you do, and they want to know your secrets.  Let’s say you are set up at an event, and that person picks up item after item asking, “Where did you get your blanks; where do you purchase your vinyl; where did you find this image?”  At what point is this person no longer simply curious of your trade?  At what point do you seal up like a vault?  What do you say to someone in this situation?

Here are my thoughts.  I am all for helping people out.  I would eventually like to do tutorials on different items that I feel I’m very confident in creating, to provide assistance to people at the beginner level.  HOWEVER….. I have worked so very hard to get where I am, that I also find myself feeling defensive at a certain point.  Just like in the example above, I’ve spent thousands of dollars on supplies and equipment in addition to hundreds of hours of research.   I’m not going to just hand over all my information.  To the people who feel it’s acceptable to approach a stranger or even an acquaintance and tell them that you basically want to copy what they do, have a little respect. 

I also understand that the crafting world has experienced a bit of an explosion over the last few years.  Especially with the popularity of tools such as the circuit and silhouette, so many people have begun making their own items and in turn starting their own businesses.  I salute you all and LOVE shopping from small businesses.  Because of this surge in crafting, each and every one of us has to keep up to date on what’s popular and adjust accordingly.  There will always be competition and I’m fine with this.  But if you are trying to compete with another business, please stand out on your own.  Take the initiative to do some research on your own.  Perhaps the techniques that I use to make something, work great for me, but not for you.  Again everyone is different, but I want my company to stand out and be as unique as possible.

Now for what I consider one of the most difficult tasks, how do you respond to such questions?  Personally, I try to stay cordial with everyone.  I don’t want to argue with someone if I don’t have to.  Frankly, who needs extra stress in their life?  Insert the famous, “Ain’t nobody got time for that” quote.  I prefer for people to only associate good interactions with my business.  For me, I would keep my response minimal and perhaps a bit cheeky?  If someone asks where I get my merchandise or blanks, I may say something like, “I purchase from several companies.  If you do a little digging you can find decent companies to buy from in bulk.”  I feel that was short, somewhat informative and yet I didn’t provide info on where I actually get my merchandise.  As far as the techniques used to make something, again vague responses would be my method.  “As far as technique, it really varies on what I’m making and how I want it to look.”  Hopefully, the spy catches your drift and realizes they aren’t going to get much info from you.  I suppose if that person persisted in attempting to interrogate I would just have to politely yet sternly let them know how hard I’ve worked that I can’t share that information, they’ll have to do the research on their own. I mean Colonel Sanders recipe is still a secret after all these years, right?

I understand this post may not have been incredibly insightful, however I’m hoping it helps provide confidence to like minded individuals that you aren’t alone.  The next time you find yourself in this situation, perhaps you’ll remember this post and feel more comfortable with the interaction.  As always, thank you for visiting the website.  Feel free to share your thoughts in the comments below.  If you liked this post please click on the heart to show some love. 

Tips For Small Business Owners Part Three: How to Handle Disgruntled Customers

By Toni Hetrick

Have you ever met a person that says they absolutely LOVE working in customer service?  I’d be willing to bet it’s rare. Especially in this day and age where customers have several methods of contacting you regarding a service or product sold.  For me, it’s rare that I see a customer in person. Texts; emails; Facebook messaging; Instagram messaging; commenting on Facebook posts and website inquiries are all ways that I am regularly contacted by customers.  For whatever reason, many people take on a whole new level of confidence when they aren’t speaking to you in person, and therefore can be extra difficult. Don’t get me wrong, some people are extra difficult in person too, but removing an in-person experience creates many “telephone tough guys” (yes that’s a Lethal Weapon reference ;) ).  I also feel that removing direct communication from a transaction can open up room for misunderstandings.  

You can’t please everyone.  Let us make that clear from the start.  You can, however, do your very best to have amazing customer service, which to many people is a very important factor.  Personally, I will be a return customer and will make referrals to a company that I’ve had good experiences with. Especially if there was a problem somewhere along the way and they did their best to fix it.  With that being said, prepare yourself for the times where you try your best, but just can’t seem to come to a reasonable solution with your customer. It’s bound to happen at some point, so be prepared.  

When it comes to this topic, the first thing that enters my mind is doing everything that you can to avoid reaching the point where you have an upset customer.  For me, I try to communicate clearly with customers to lessen any confusion. Please don’t take this the wrong way, but I feel it’s safest to explain things in a manner where even a small child could understand.  We all communicate, listen and interpret things differently so it’s probably best to simplify things to a crystal clear point.  

Let’s dissect “communicate” a little further so that you have a good idea of what I’m referencing.  With my business, I take orders for several custom made items. When taking an order, I have a conversation with that customer to see what they are wanting.  During this conversation I ask many questions, attempting to get the best image of what that customer wants as an end result. I then summarize that order and have them confirm in a few different ways.  If at all possible, I create a mockup to give them an idea of what their item will look like. This gives the customer the opportunity to approve a proof. This is the ideal situation. It’s not possible for all orders, but I try my absolute best to create this situation.  

With custom made items, I require payment upfront (heads up, there will be a blog post about this in the future).  I add their order to my website and send them the link to review their order and make payment. I ask the customer to review the proof carefully, check the spelling and the design, as once the proof is approved, that is the design that will be used to make their custom item.  By the time the customer has paid for their order, they have had the opportunity to review the description of their order multiple times. In the event that this person claims their order is wrong once it’s complete, you can show them all of the opportunities they had to review the order before it was custom made. 

At this stage, you also have the opportunity to insert some of your company’s policies such as return policies, turnaround times, shipping methods, etc.  Not only does this provide some additional comfort to new customers that you are a more grounded, legit business, but it may clear up questions that they may have instead of them having to ask you.  If you don’t have such policies in place, this may be a good time to sit and develop some. The few minutes that it takes to create a policy may save you some headaches in the future. Take some time, do a little research and develop simple clear policies.

Since implementing such things to my business, I have had far fewer issues than I had in the past.  You will still come across people that simply don’t read or pay much attention to detail and then later come back to say that their order is wrong.  My initial tactic in such situations is being as nice as possible to them from the very start. Apologize that they are unhappy with their order and then take the time to review the documentation to support the way their order was placed.  If you were the one to make the mistake, then, by all means, own up to that mistake and make it right. Yes, you may lose money by replacing the product, but it was your mistake and if you want a return customer, good reviews and word of mouth referrals, you want to make sure you do the right thing.  If the mistake was theirs then try breaking that to them nicely. Show them the order details, mockup and whatever else they had the opportunity to review before placing the order. Perhaps, express sympathies for the error but that your policy states……. You could then offer them a discount to place another order with the correct information.  If I were the customer, I would be upset with myself for making the mistake and would be happy to get a discount even though the error was not on behalf of the business. Again this may not satisfy everyone, but I have found that it works a very large percentage of the time.  

To summarize, cover your butt!  Provide detailed product descriptions.  Take good pictures, from multiple angles if possible.  Create mockups as much as possible. Keep your customer informed.  All of these things will help you run a successful business with happy customers.  Happy customers equal return customers. I hope you found this blog post helpful. If you did, please click the heart button below to show some love.  Please refer your friends and family to this blog if you feel they may enjoy it. As always, thank you for visiting the website.

Tips For Small Business Owners Part Two: Greeting & Communication

By Toni Hetrick

In the last blog post, I covered some helpful tips to make you look like a pro at vendor events.  I hope you enjoyed it. If you missed that post, you can find it here.  While writing that particular post, I felt like I could go on for a while with one specific topic.  I then decided to make a separate post for that topic alone, to provide more detail as I feel it’s been a prevalent part of my business growth.  What I’d like to discuss further is greeting and communicating with your potential customers.

This is a small setup for my Frugal Fashionista, however this was our first time attending Wine Down Weekend in Huntingon, PA. Next year will be much bigger.

This is a small setup for my Frugal Fashionista, however this was our first time attending Wine Down Weekend in Huntingon, PA. Next year will be much bigger.

In the event that you are new to my page, I’d like to give you a little background on myself.   I am Toni Hetrick, aka The Frugal Fashionista. I have had my own business for close to 14 years.  I do not have a brick and mortar storefront. The majority of my years in business, my sales have been, from what I refer to as “vendor events”.  These are small local events, most often held at churches, community centers, fairgrounds, convention centers, etc. I wish I would have kept count over the years as to how many I’ve attended but unfortunately, I didn’t. 

I would, however, consider myself a seasoned veteran of such events. I have attended SO many, and have taken away a great deal of knowledge and observations. Over the years my business has grown to now include a website, social media accounts, and a blog, all while continuing to attend vendor events.  Not that this is a detailed background, but I feel a little better sharing that with you so that I have less chances of someone saying, “who does this lady think she is???”, and “how does she know???”. 

Huntingdon County Fair
82782038_3250937254921424_9053014925017874432_n.jpg

Now onto the topic at hand…..  I have found that simply greeting an approaching customer and finishing with a smile makes a world of difference.  For the longest time, I didn’t want to jump on a customer as soon as they approached my area, fearing that I would make them uncomfortable and they wouldn’t want to stop at my booth.  I’m sure many of you have encountered a very pushy salesperson at one point or another. You might as well spray some sort of repellent on me with those tactics. Nope, nope, nope! Instead, I found that there are people who are comfortable asking questions and then there are people who aren’t.  You just need to create a friendly environment where people know they won’t be attacked.

 I experimented at one event where it seemed to be a common thread that people were just milling around.  Not really shopping. I decided to try to talk to every person that passed my table in a non-aggressive way.  I would say, “Hello, how are you today”. From this, people would look up, make eye contact and usually respond with, “Fine and you?”  My response was usually, “I’m great. Let me know if you have any questions”. I’m pretty sure the conversation could not be any more simplistic.  This approach made a significant difference. I greeted them, but also allowed them to not be bothered and pressured into purchasing something. I could not believe the number of people that then stopped, looked at my merchandise and continued to carry on a conversation.  

I felt as though I had discovered magical powers.  In just a few seconds’ time, I was able to make a person feel comfortable and relaxed enough to stick around for a while.  Even if they don’t purchase anything you now have the opportunity to introduce yourself, your company and everything that you offer.  This is huge! Marketing is expensive, so why not do as much as you can with words and in-person interaction for FREE?? I believe that this impression lasts longer than a Facebook Ad that you scroll past, wondering how in the world that got into your feed.  A greeting costs nothing. You have nothing to lose but perhaps an awkward moment once in a while when someone doesn’t respond to your greeting. Perhaps give this 10-second tactic a try at your next event and let me know what you experience. As always thank you for visiting the blog.  Comment below if you would be interested in more blog posting such as this one, with helpful tips for a new business.

Tips For Small Business Owners Part One: How To Look Like A Pro At Vendor Events

By Toni Hetrick

Do you set up at local events?  There’s definitely a potential for some great sales, marketing and business growth IF you present yourself correctly.  A professional display is KEY! For most events, you will be confined to a small space.   Many times a 6 or 8ft table is all that you will have. At most you may have a 10x10 space, so summon your inner OCD and find ways to organize/maximize the area that you have.

Let us start with the basics…..

Invest in some quality folding tables.  Most often I use two 6ft tables and one 5ft table.  You can find folding tables at many stores, but if you are an Amazon shopper you can find them here. These may seem expensive at first, but they can take a beating and you’ll use them over and over again.  If I had to guess, I’d estimate that I purchased mine 10 years ago and they are still in perfect working condition. Another plus is that they can always be used for non-business related things too.  Ex: Family Picnics, group gatherings, etc. I have used my tables for so many purposes and since they fold they store rather easily.  

**VERY IMPORTANT TIP FOR BEGINNERS**

Tables most often are not provided.  Make sure you confirm this when booking.  There’s nothing worse than getting to an event and discovering you don’t have something as vital as a table.  Be prepared!

Invest in professional looking table cloths.  There are multiple options out there, such as these.  You can always have them made, or if you sew to make your own.  Whatever you decide to keep in mind you will want to hide the items stored under your table.  It’s also a plus to have something that is easily washable. For years, I went to the cheap/convenient route and purchased disposable ones from Dollar Tree.  Don’t get me wrong, they get the job done, however they are wrinkly from the start and rip very easily. Sometimes convenience takes over and you just go with that option.  Looking back at the money that I spent on those cheap table covers, I could have bought a nice table cloth 5x’s over.

Depending on what you sell, your setup may vary greatly from other businesses.  I carry an array of items, 90% of which is cash & carry. Because of this, the more I have on hand, the more I have available to sell on-site that day.  My tables are usually filled to the max but are organized kind of by categories if you will. An organized table helps attract customer’s eyes. Most people don’t want to have to root through a pile of stuff to see what you have.  Remember this is a reflection of your business. You don’t want people to feel like they are at a yard sale. Also don’t expect that your setup will be exactly the same each and every time. You’ll have to adapt.  Below is a video from a recent holiday event. As you can see I don’t have my fancy tablecloths at this set-up as the tables were provided and they were BIG tables. I adjusted and used my holiday ones.

One thing I have noticed over the years is that people seem intimidated to ask questions, especially about prices.  They will just walk right by if they can’t see prices. Having said that, make sure all your merchandise is priced and that those prices are easily visible.  If you’re selling a product that some may not know exactly what it is just from glancing at it, consider signage that explains what the product is used for. This is a task that you can accomplish easily, quickly and without breaking the bank.  I always have index cards and sharpies with me and will make extra little signs. Ex: Cutting Boards $25. When I implemented this, I could not believe the immediate difference in sales and customer interaction. I noticed customers looking at an item, seemingly interested but then walking away.  I started to verbally tell people what the price of the item was and found that people just naturally assumed that the item was expensive. My sales were increasing by this step, so I decided to take it further and make sure that EVERYTHING had a price tag that was facing outward and/or a sign with the price as well.

Say hello to everyone who enters or approaches your area.  I don’t care for pushy salespersons. Everyone has their own tactics, but I feel simple, polite conversation works wonders for keeping a person in your booth long enough to shop.  This also leaves an impression on your customers. I have found that a simple, “Hello, how are you today?” is more than enough to get a conversation started. You’d more than likely be a return customer to someone who is a delight, right?  I’ve paid a great deal of attention to people as they approach my booth. Most have their eyes down as they approach you. They are glancing down at the table, and I think are avoiding eye contact because they don’t want someone trying to sell them something in an aggressive way.  


Hand out business cards!!!!  This is a HUGE opportunity for you to make a connection.  I make sure that with every sale, a business card goes into their bag.  Anyone with whom I have a conversation with, I ask if I can give them a business card.  I’ve never been told no. With companies like Vistaprint, you can purchase business cards at very inexpensive prices.  Have those marketing materials ready! This is an opportunity to let customers and potential customers know everything and anything you offer.  If your business is anything like mine, I offer such a vast array of services/products that there’s no way for me to showcase all of that on just a 6ft table. 

I hope that these tips helped to some degree. If you have any questions please feel free to comment below. If you liked this post please click on the little heart to show some love. As always, thank you for visiting the website.

Instant Pot Homemade Vegetable Broth from Veggie Scraps

Recently I decided to experiment with making my own vegetable broth from some veggie scraps I had been saving over the last few months. With the change of seasons, temps have dropped and I’m not sure about you, but when a chill hits the air it signals a craving for hearty comforts foods. As some of you may already know, I make food for our lovely dog Lincoln. If you’re interested in my recipe and process, you can read about it here.

A few months ago, while prepping the veggies for dog food it hit me that I could possibly get a 2nd and 3rd use out of some of the scraps. It’s typically more cost-effective to buy the larger 5lb bags of whole carrots and then cut them myself. I remove the tops of the carrots and had normally been putting them directly into our compost (2nd purpose). This time I placed those tops in a freezer-safe bag and added to it each time I had more veggie scraps. It took about 2 months to fill two gallon-sized bags with remnants of carrots, celery, and scallions that were used for other meals and/or dog food.

I’m definitely not the master of broth making, but here was my process. I only used one of the gallon-sized bags and my instant pot was completely full. I placed the veggie scraps in frozen. I added 10 cups of water to the pot, 2 bay leaves, a tablespoon of turmeric and a tablespoon of minced garlic. Lock the lid in place and put the seal to closed. Set Instant Pot to 20 minutes of manual high pressure. After 20 minutes allow a natural pressure release. Once this was complete I allowed the pot to cool. I removed the veggies scraps to a colander and placed that colander over a pot as the veggies still had a great deal of broth inside of them. Especially the celery. I applied some pressure with a wooden spoon and got a significant amount of broth. I finally strained the broth and placed in large canning jars. There was enough broth to completely fill 3 large jars and still have a little leftover. Later in the week I used this broth to make vegetable soup and felt extra proud of myself for making the broth as well. Keep in mind this is a very mild broth. Once I made soup, I added salt and other spices to get more depth of flavor. After this first experiment, I believe next time I will add plenty of spices to the veggies to form a more flavorful broth. The veggies that were used to make this broth were then placed in our compost (3rd purpose).

Frozen Vegetable Scraps

Frozen Vegetable Scraps

IP filled with frozen veggies and water

IP filled with frozen veggies and water

Veggies after they had cooked

Veggies after they had cooked

Colander placed over bowl to capture more broth

Colander placed over bowl to capture more broth

Strain broth and place in jars or containers

Strain broth and place in jars or containers

74166965_823304808084464_5130961875344818176_n.jpg
Finished product

Finished product

This really couldn’t have been any easier. It was incredibly easy to save scraps. This could be made on the stove, in a crockpot or with a pressure cooker. If you give this a try to make sure to comment below and let me know how yours turned out. As always thank you for visiting the blog! If you enjoyed this post be sure to click the little heart button below and leave a comment so we know that you were here. Thanks again!

Life Hack! Simple Freezer Storage

Here’s a quick and amazingly simple life hack for you.

When I find a good price on ground beef I buy the larger packs, and will separate and freeze what I won’t be using right away.

It’s just my husband and myself that I am cooking for so I freeze approximately 1lb portions which works perfectly for most meals for us. I don’t overthink this by weighing anything. I just eyeball it based on the total package weight. I use a quart size ziplock bag and add in the ground beef. I try to equally disperse the meat inside the baggy and then I smush the bag down with my hand until the meat is in a thin even layer inside the bag. I would say the beef is less than 1/2 inch thick. I date the baggies and put them in the freezer. You might be saying, ok so why is this a life hack? Well….. because the meat is in a thin layer these stack nicely in the freezer rather than trying to fit odd shaped square or oval pieces into the freezer. More importantly when you are ready to use the meat it thaws very quickly. This is ideal for anyone who is responsible for cooking dinner. Not many of us have the time to plan well in advance every meal. Anything that is simple and fast is a plus as far as I can see. I have also seen images of some refrigerators that have little guidelines on the bottom of the freezer. I assume that these bags could be stood up on their sides and held in place by those little ridges if your freezer has them.

As always thank you for visiting our blog. If you enjoyed this post be sure to click the little heart and the bottom and leave a comment below. If you have a life hack you use and would like to share please feel free to comment below. If you give this life hack a try and find it helpful please comment below.

See how little space these take up! Very convenient.

See how little space these take up! Very convenient.

This makes for easy thawing 😊

This makes for easy thawing 😊

Our Pantry Went From Hot Mess To An Organized Success! Product Review & Storage Tips

By: Toni Hetrick

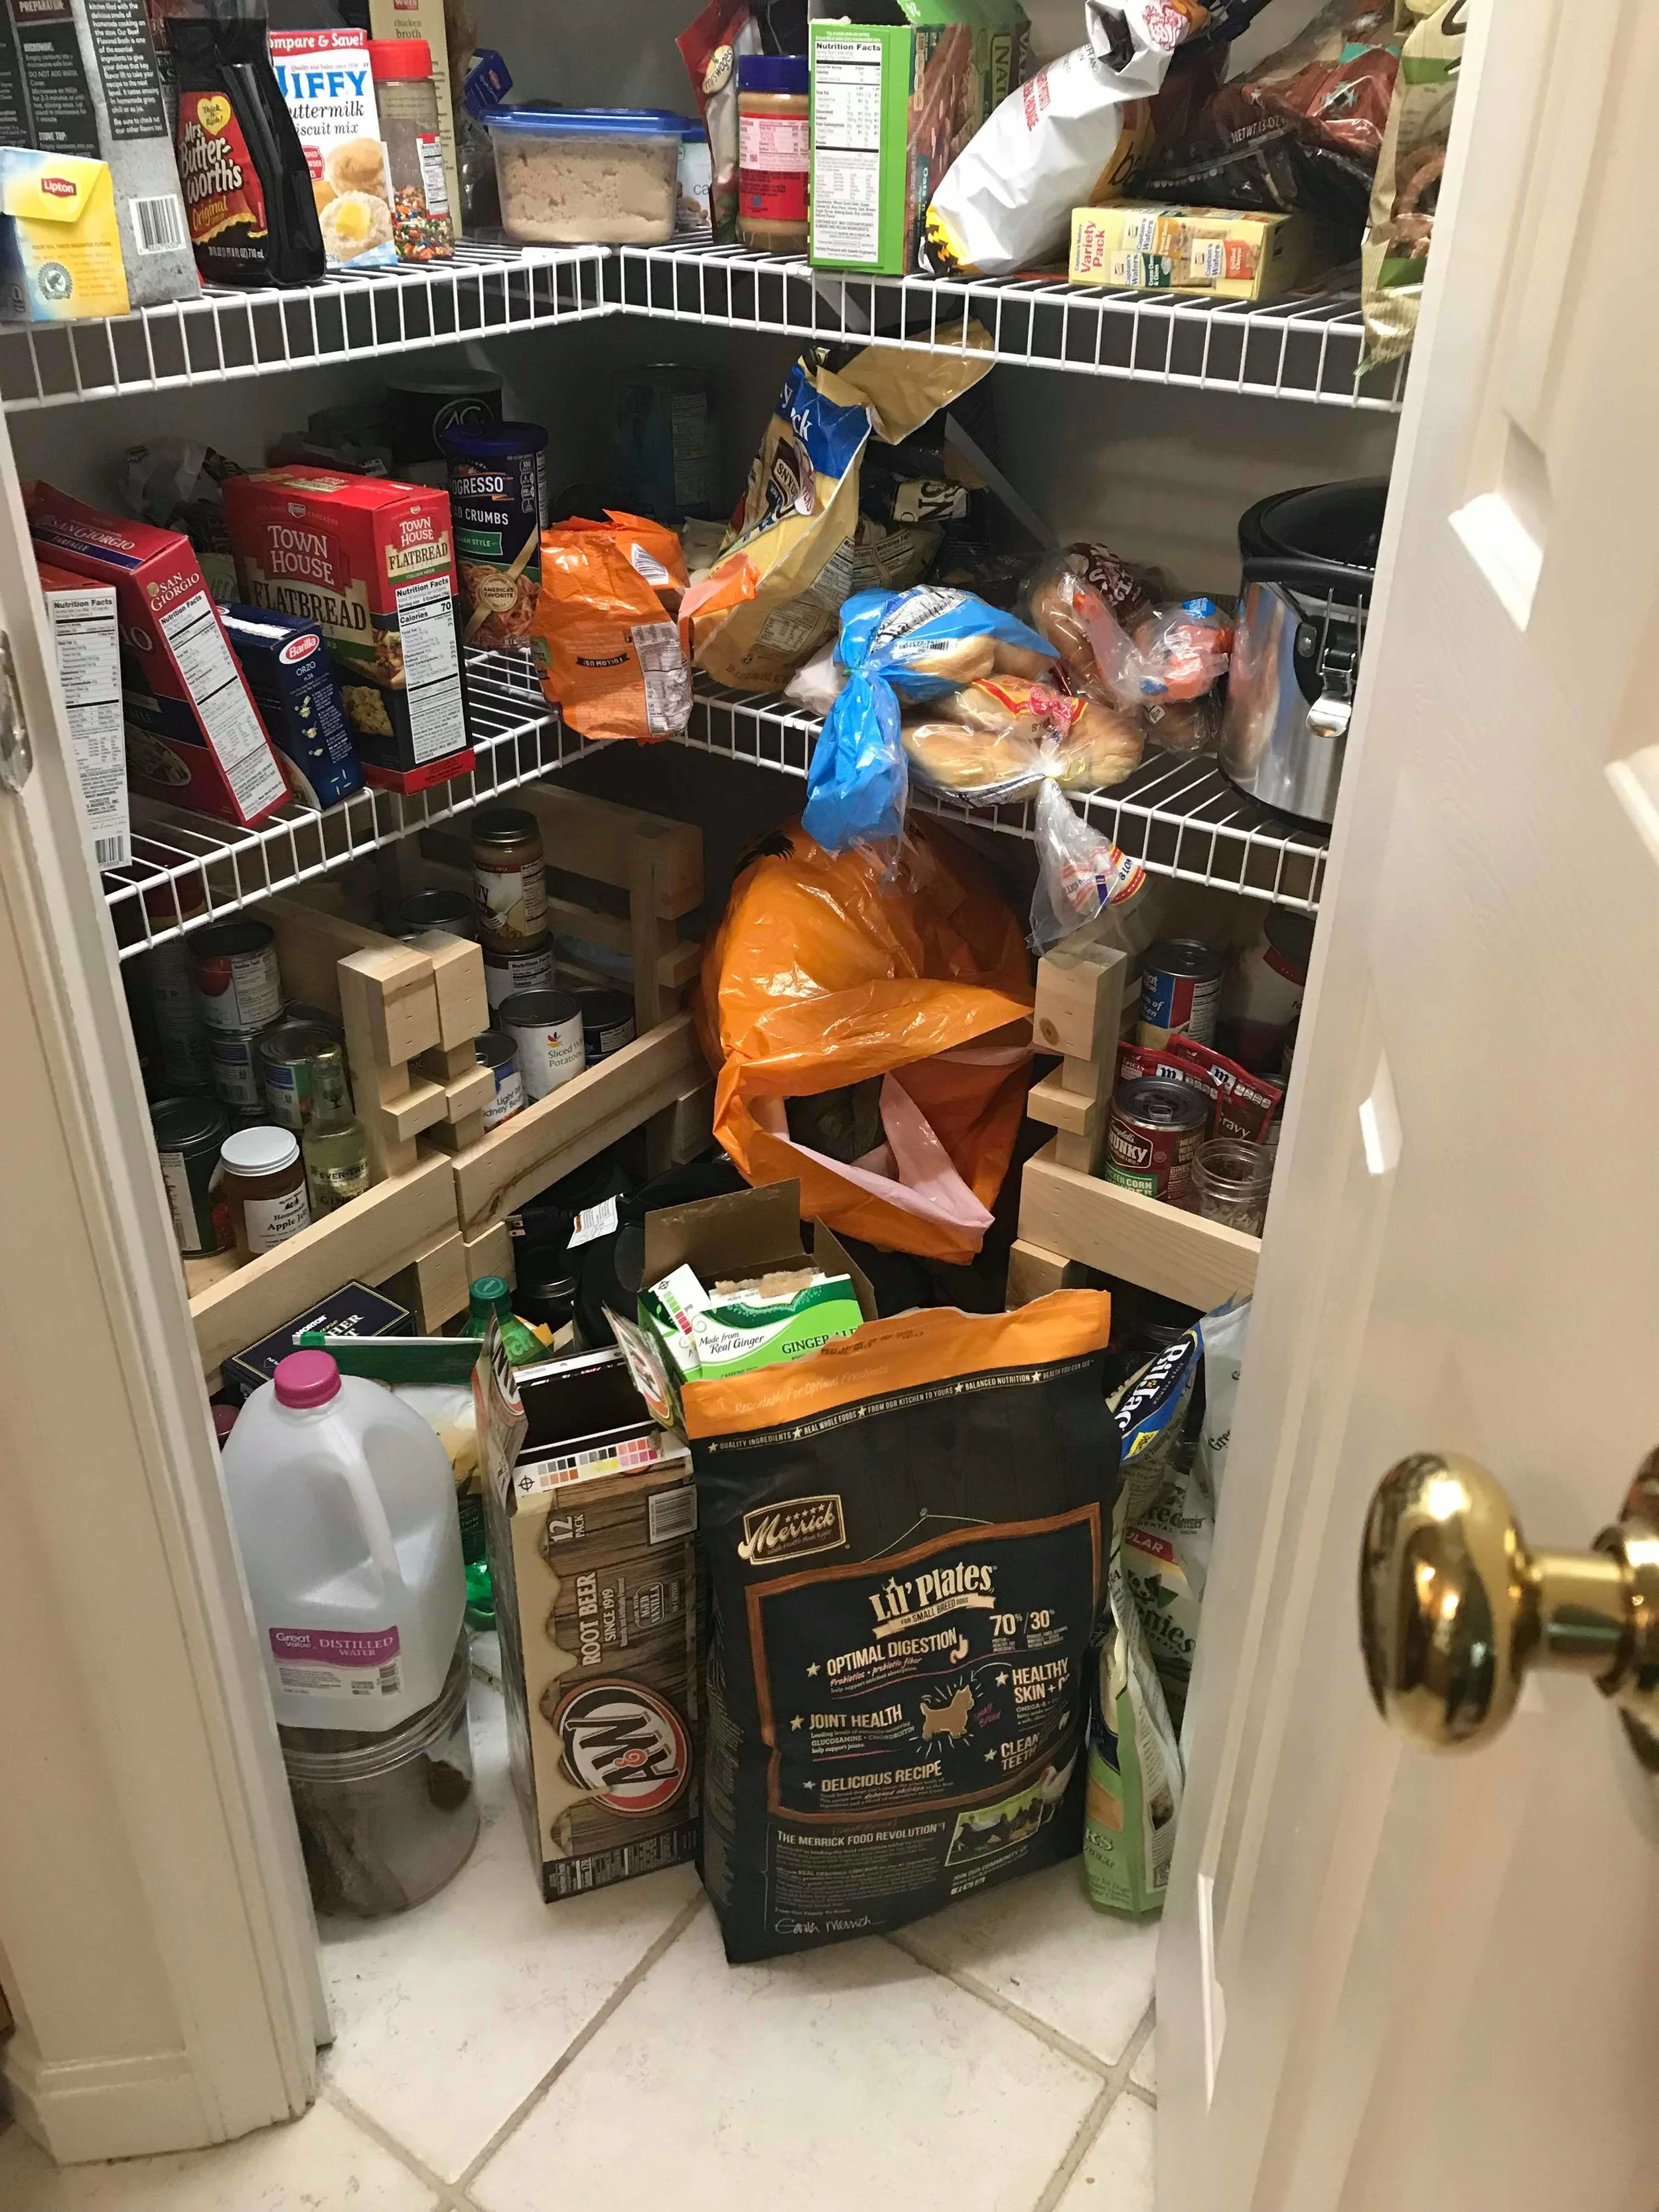
A few days ago, I opened the pantry door and said, “THAT’S IT!”.  I can’t continue to open this door and pretend that it doesn’t look like a hot mess inside.  Hopefully I’m not the only person with a messy pantry.  As I stood in front of the pantry, head bowing in shame, it hit me that this pantry has only been organized maybe twice in the last six years.  When I say organized, I mean everything pulled out and completely sorted, then put away neatly in its own little space.

I feel like this is one of the areas of a home that is out of sight, out of mind.  The chore of grocery shopping is large enough, so once I get home from that treacherous soul sucking trip, I just want to get everything unloaded and put away as quickly as possible.  I have avoided organizing this pantry, I mean who wants to do that? There’s nothing about that situation that sounds like fun to me.  At any rate, I reached my breaking point and decided to get my act together.  I needed to step up and adult on this one.

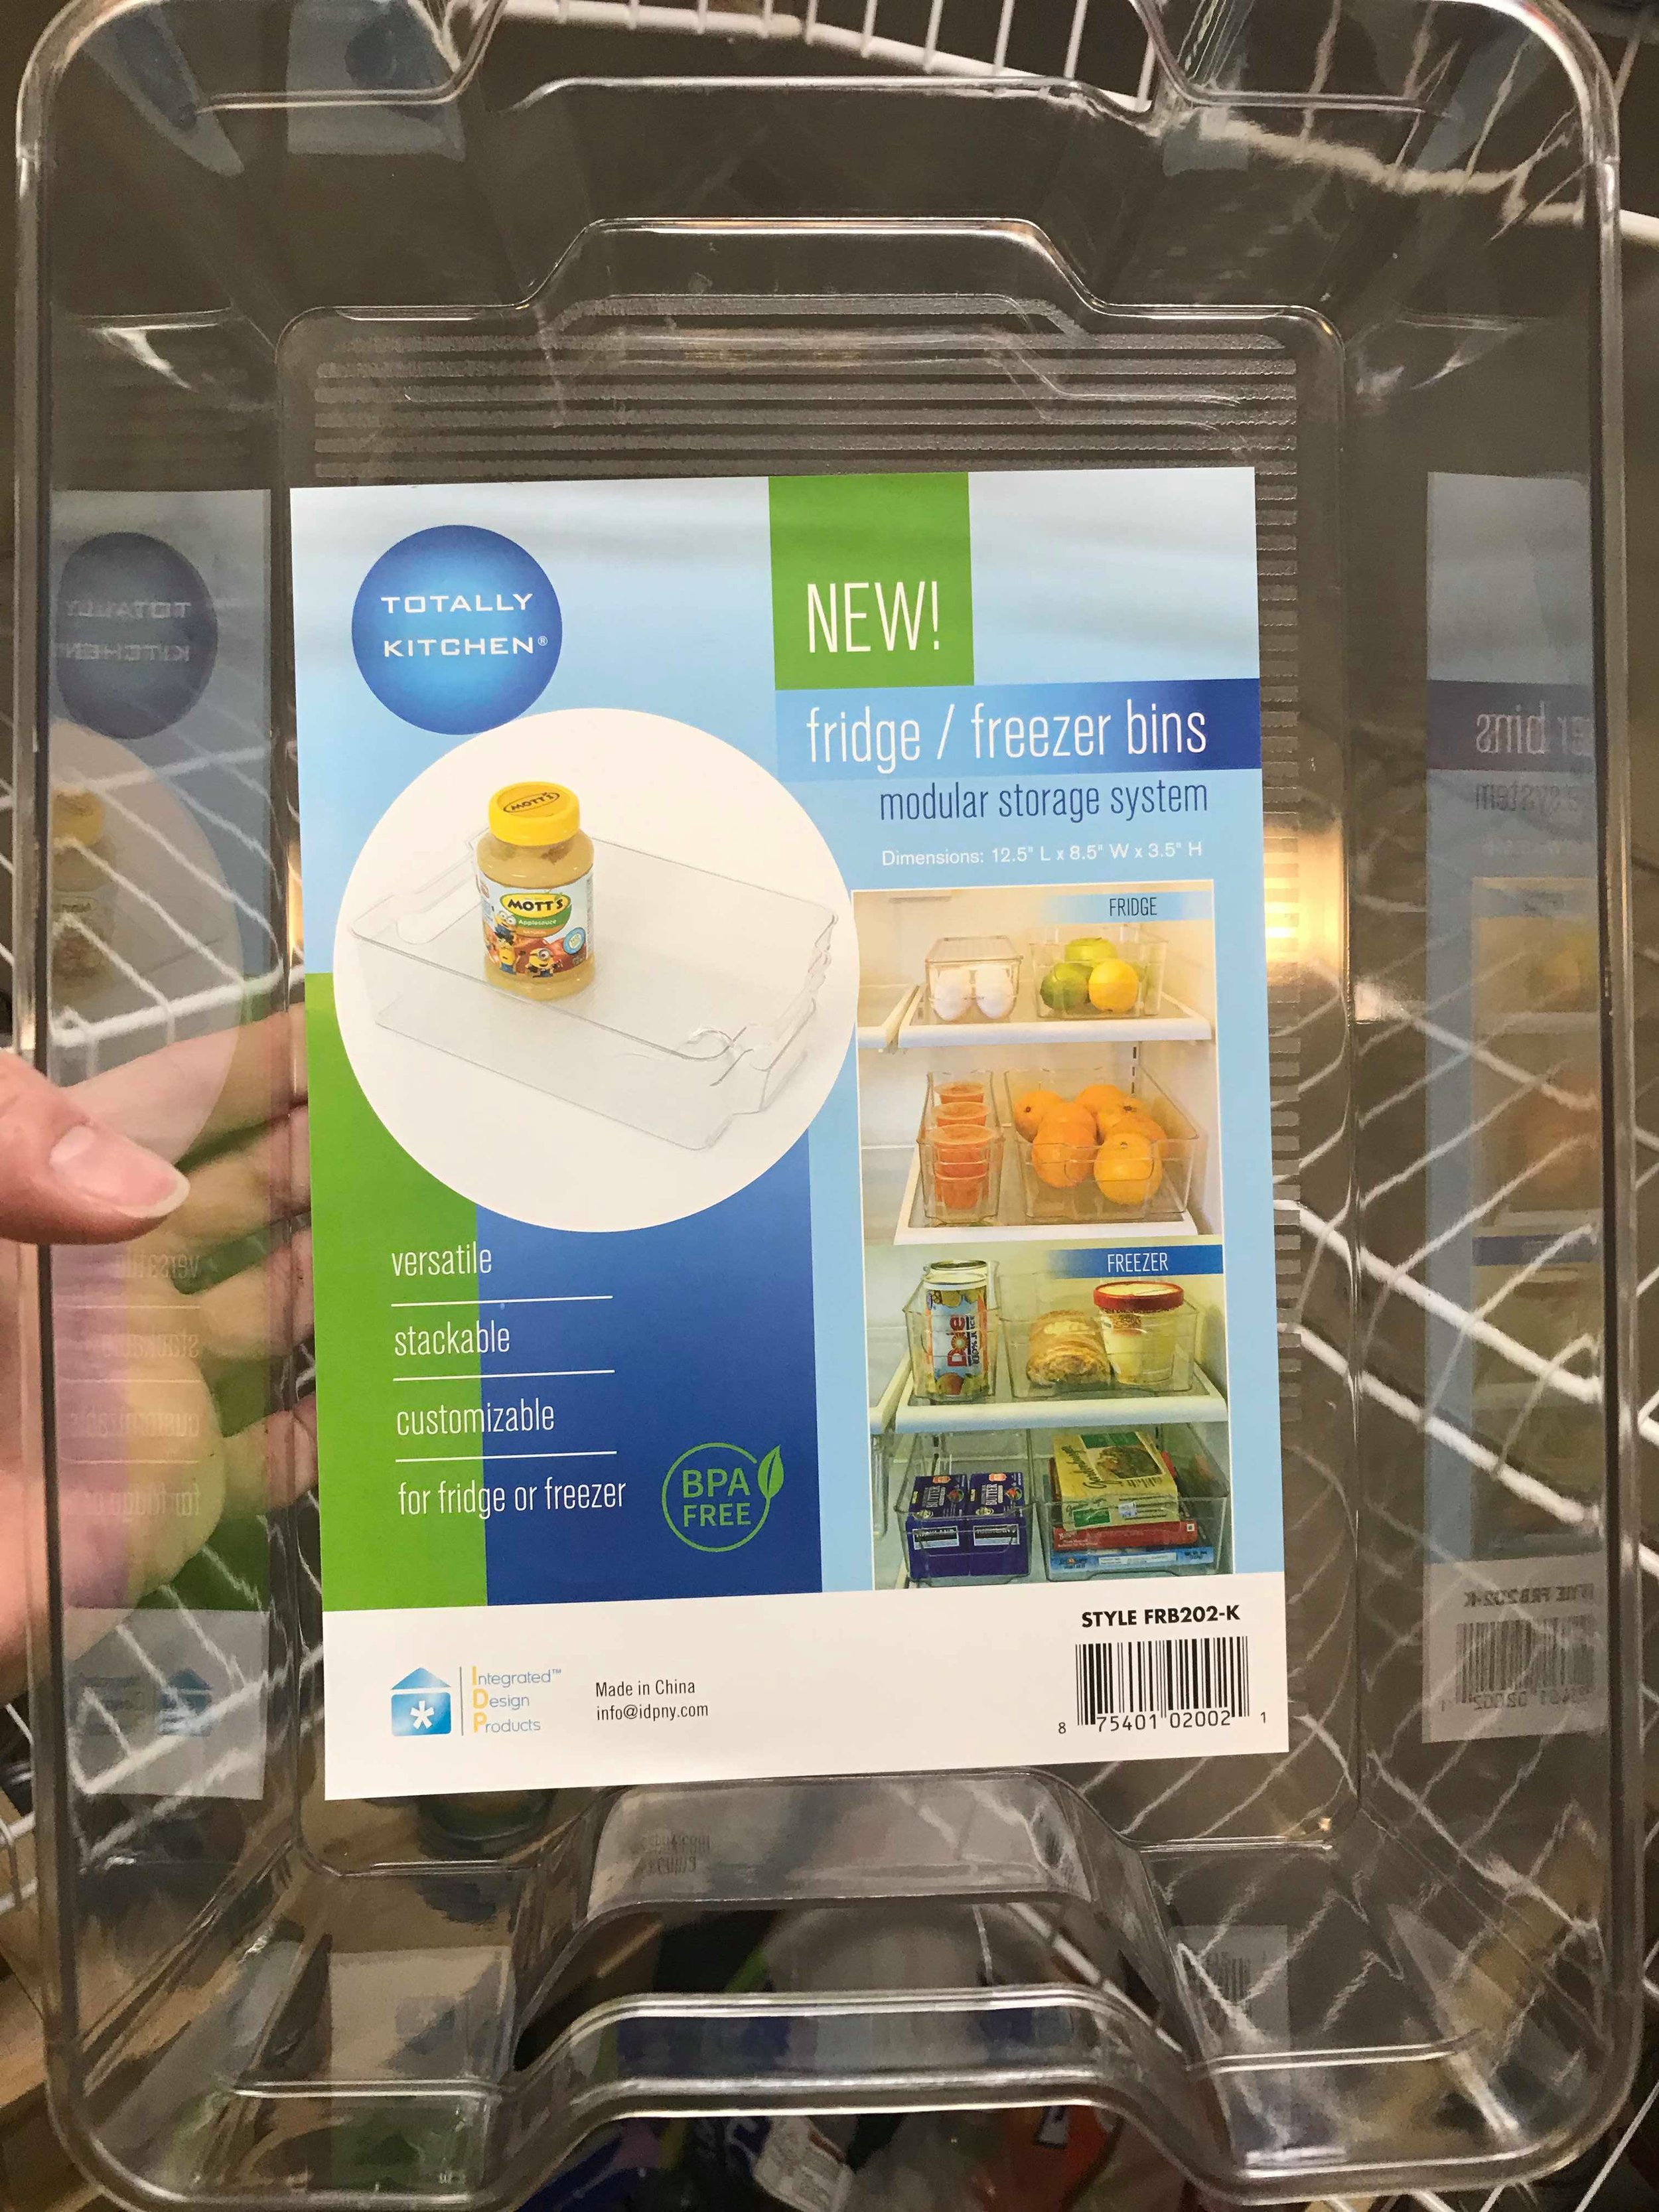
When I think of an organized system, I think of containers.  I feel like containers would work especially well sitting on the slotted racks in the pantry.  It’s annoying to have for example a bag of rice that won’t stand upright due to those racks.  After some searching, I decided to purchase these fridge & freezer safe, BPA free bins.  They are made by Totally Kitchen and come in a variety of sizes.  They are versatile and can be stacked.  As soon as I saw them, I knew they would do the job.  I LOVE the fact that they are freezer safe.  I see a freezer organizing project in my near future.

These are the storage bins I chose. I LOVE them!

These are the storage bins I chose. I LOVE them!

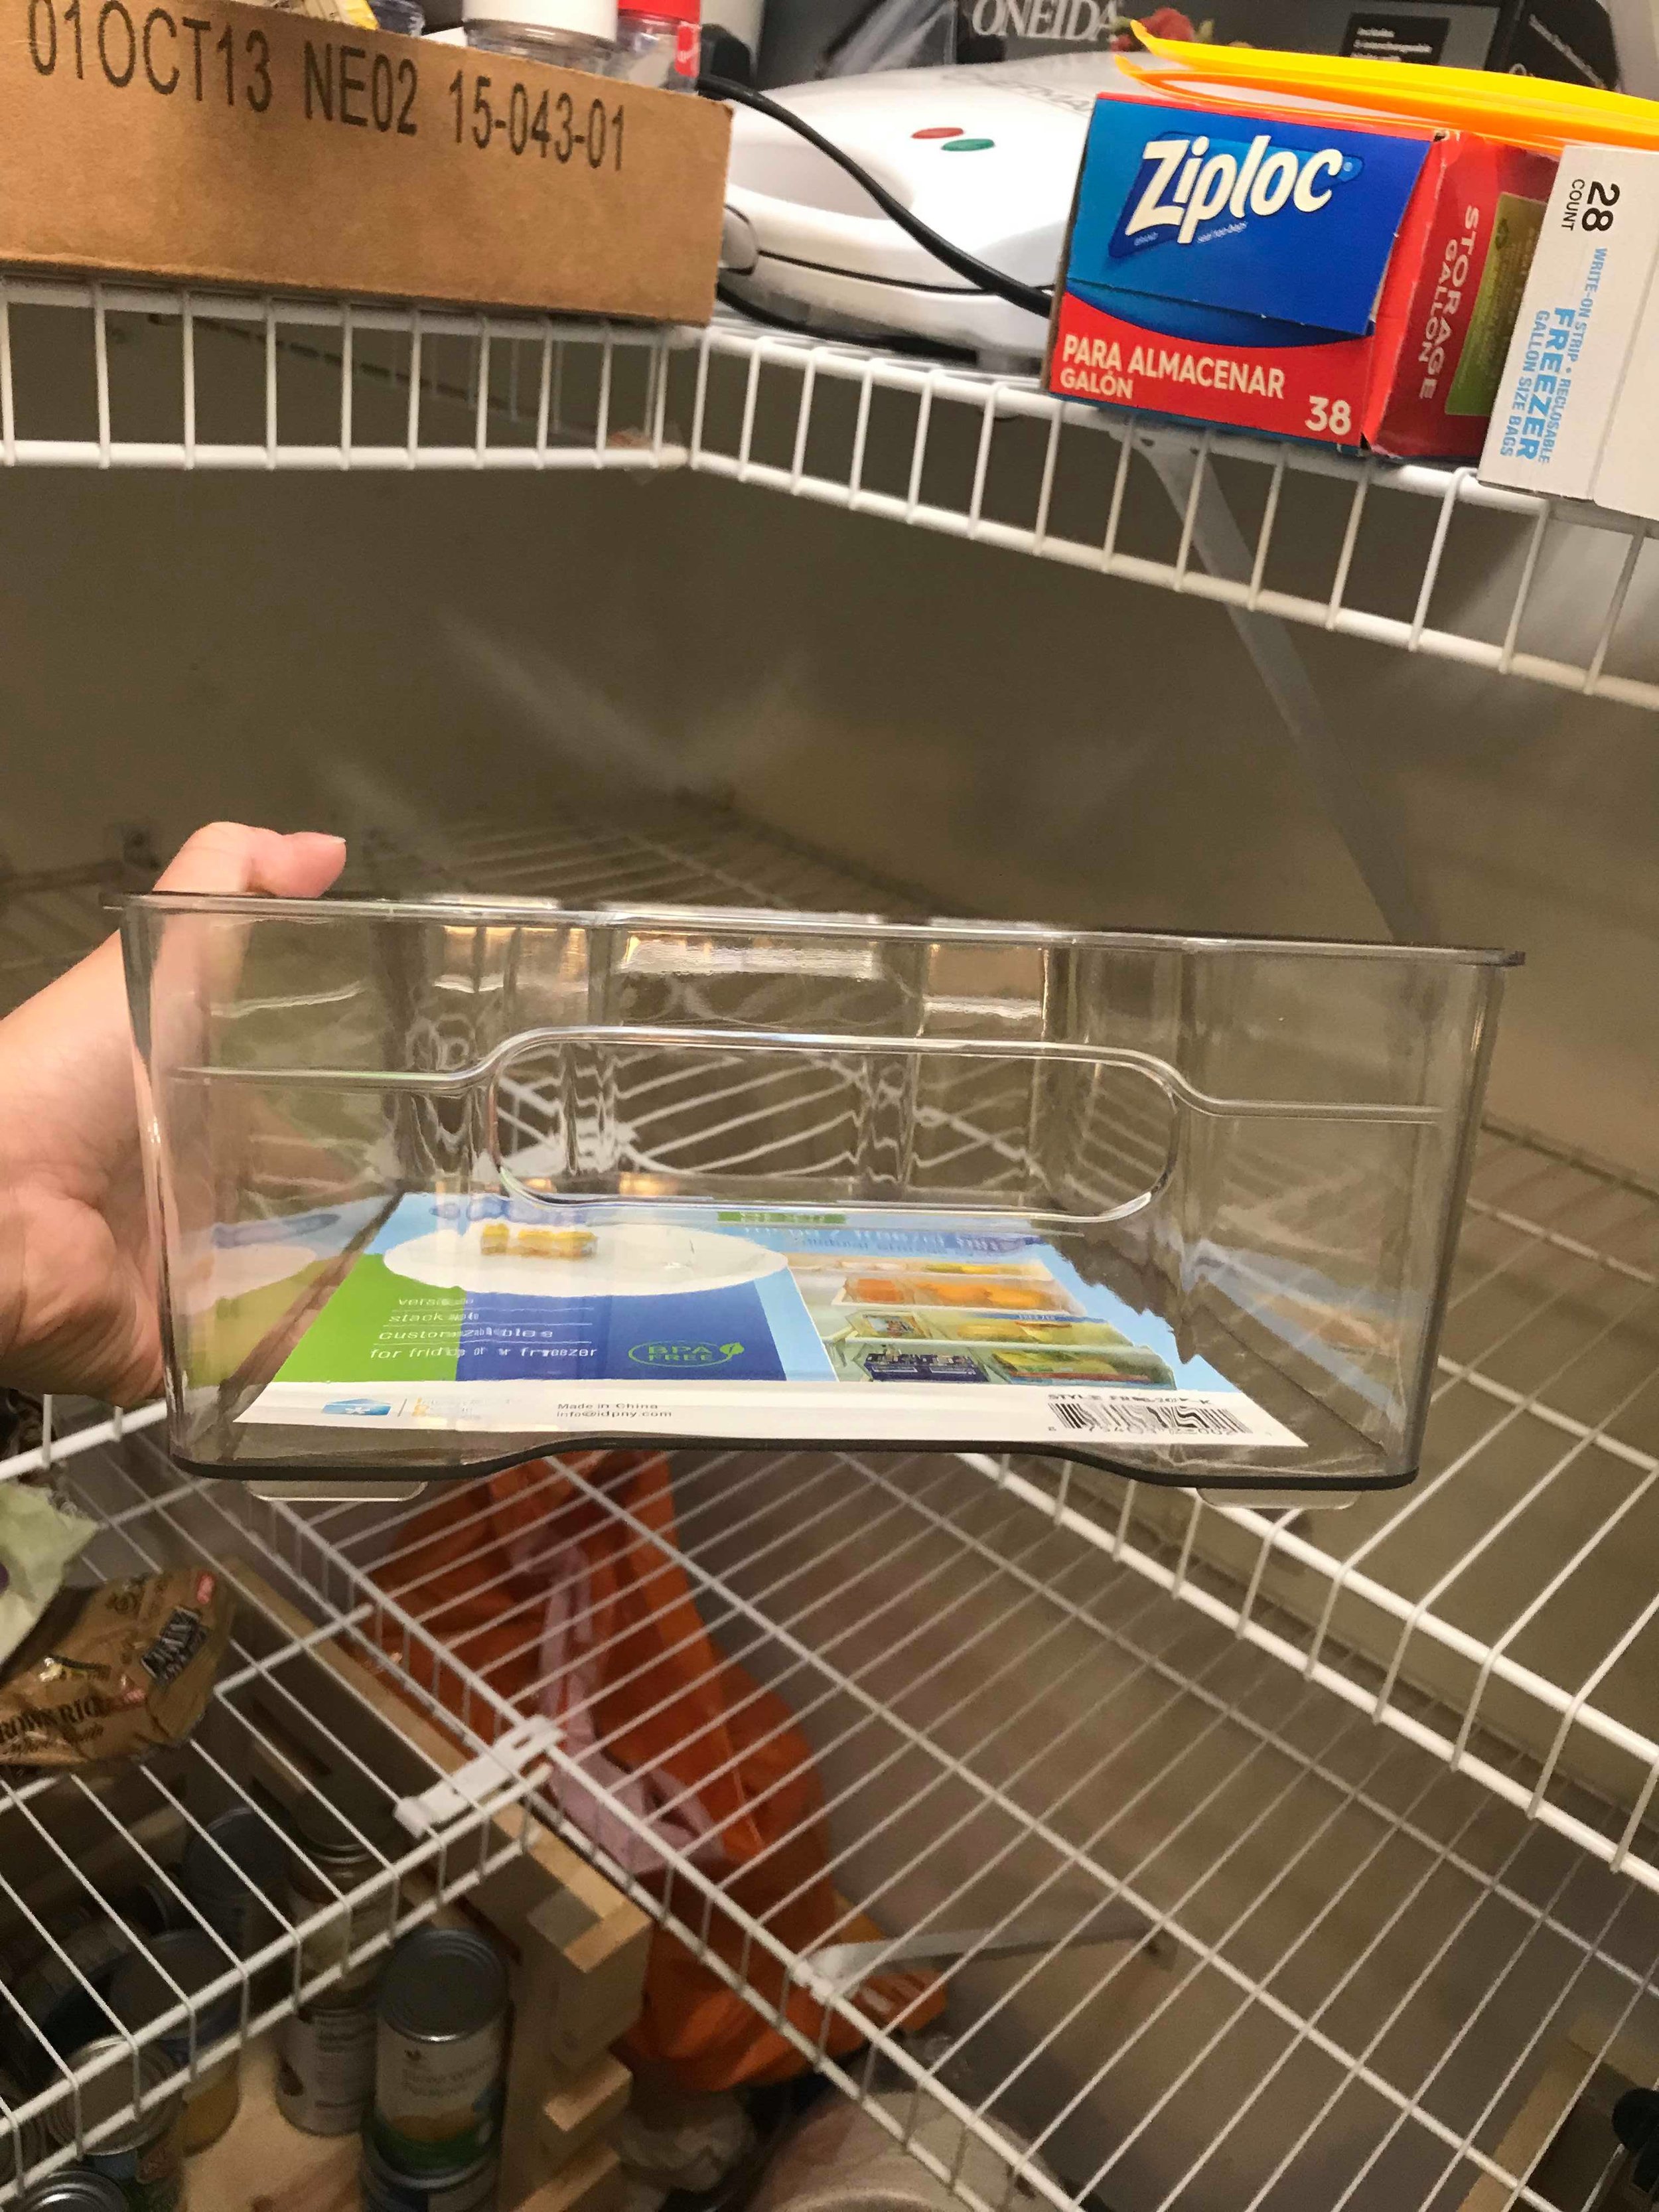
These have a little handle area so that you can easily pull them out.

These have a little handle area so that you can easily pull them out.

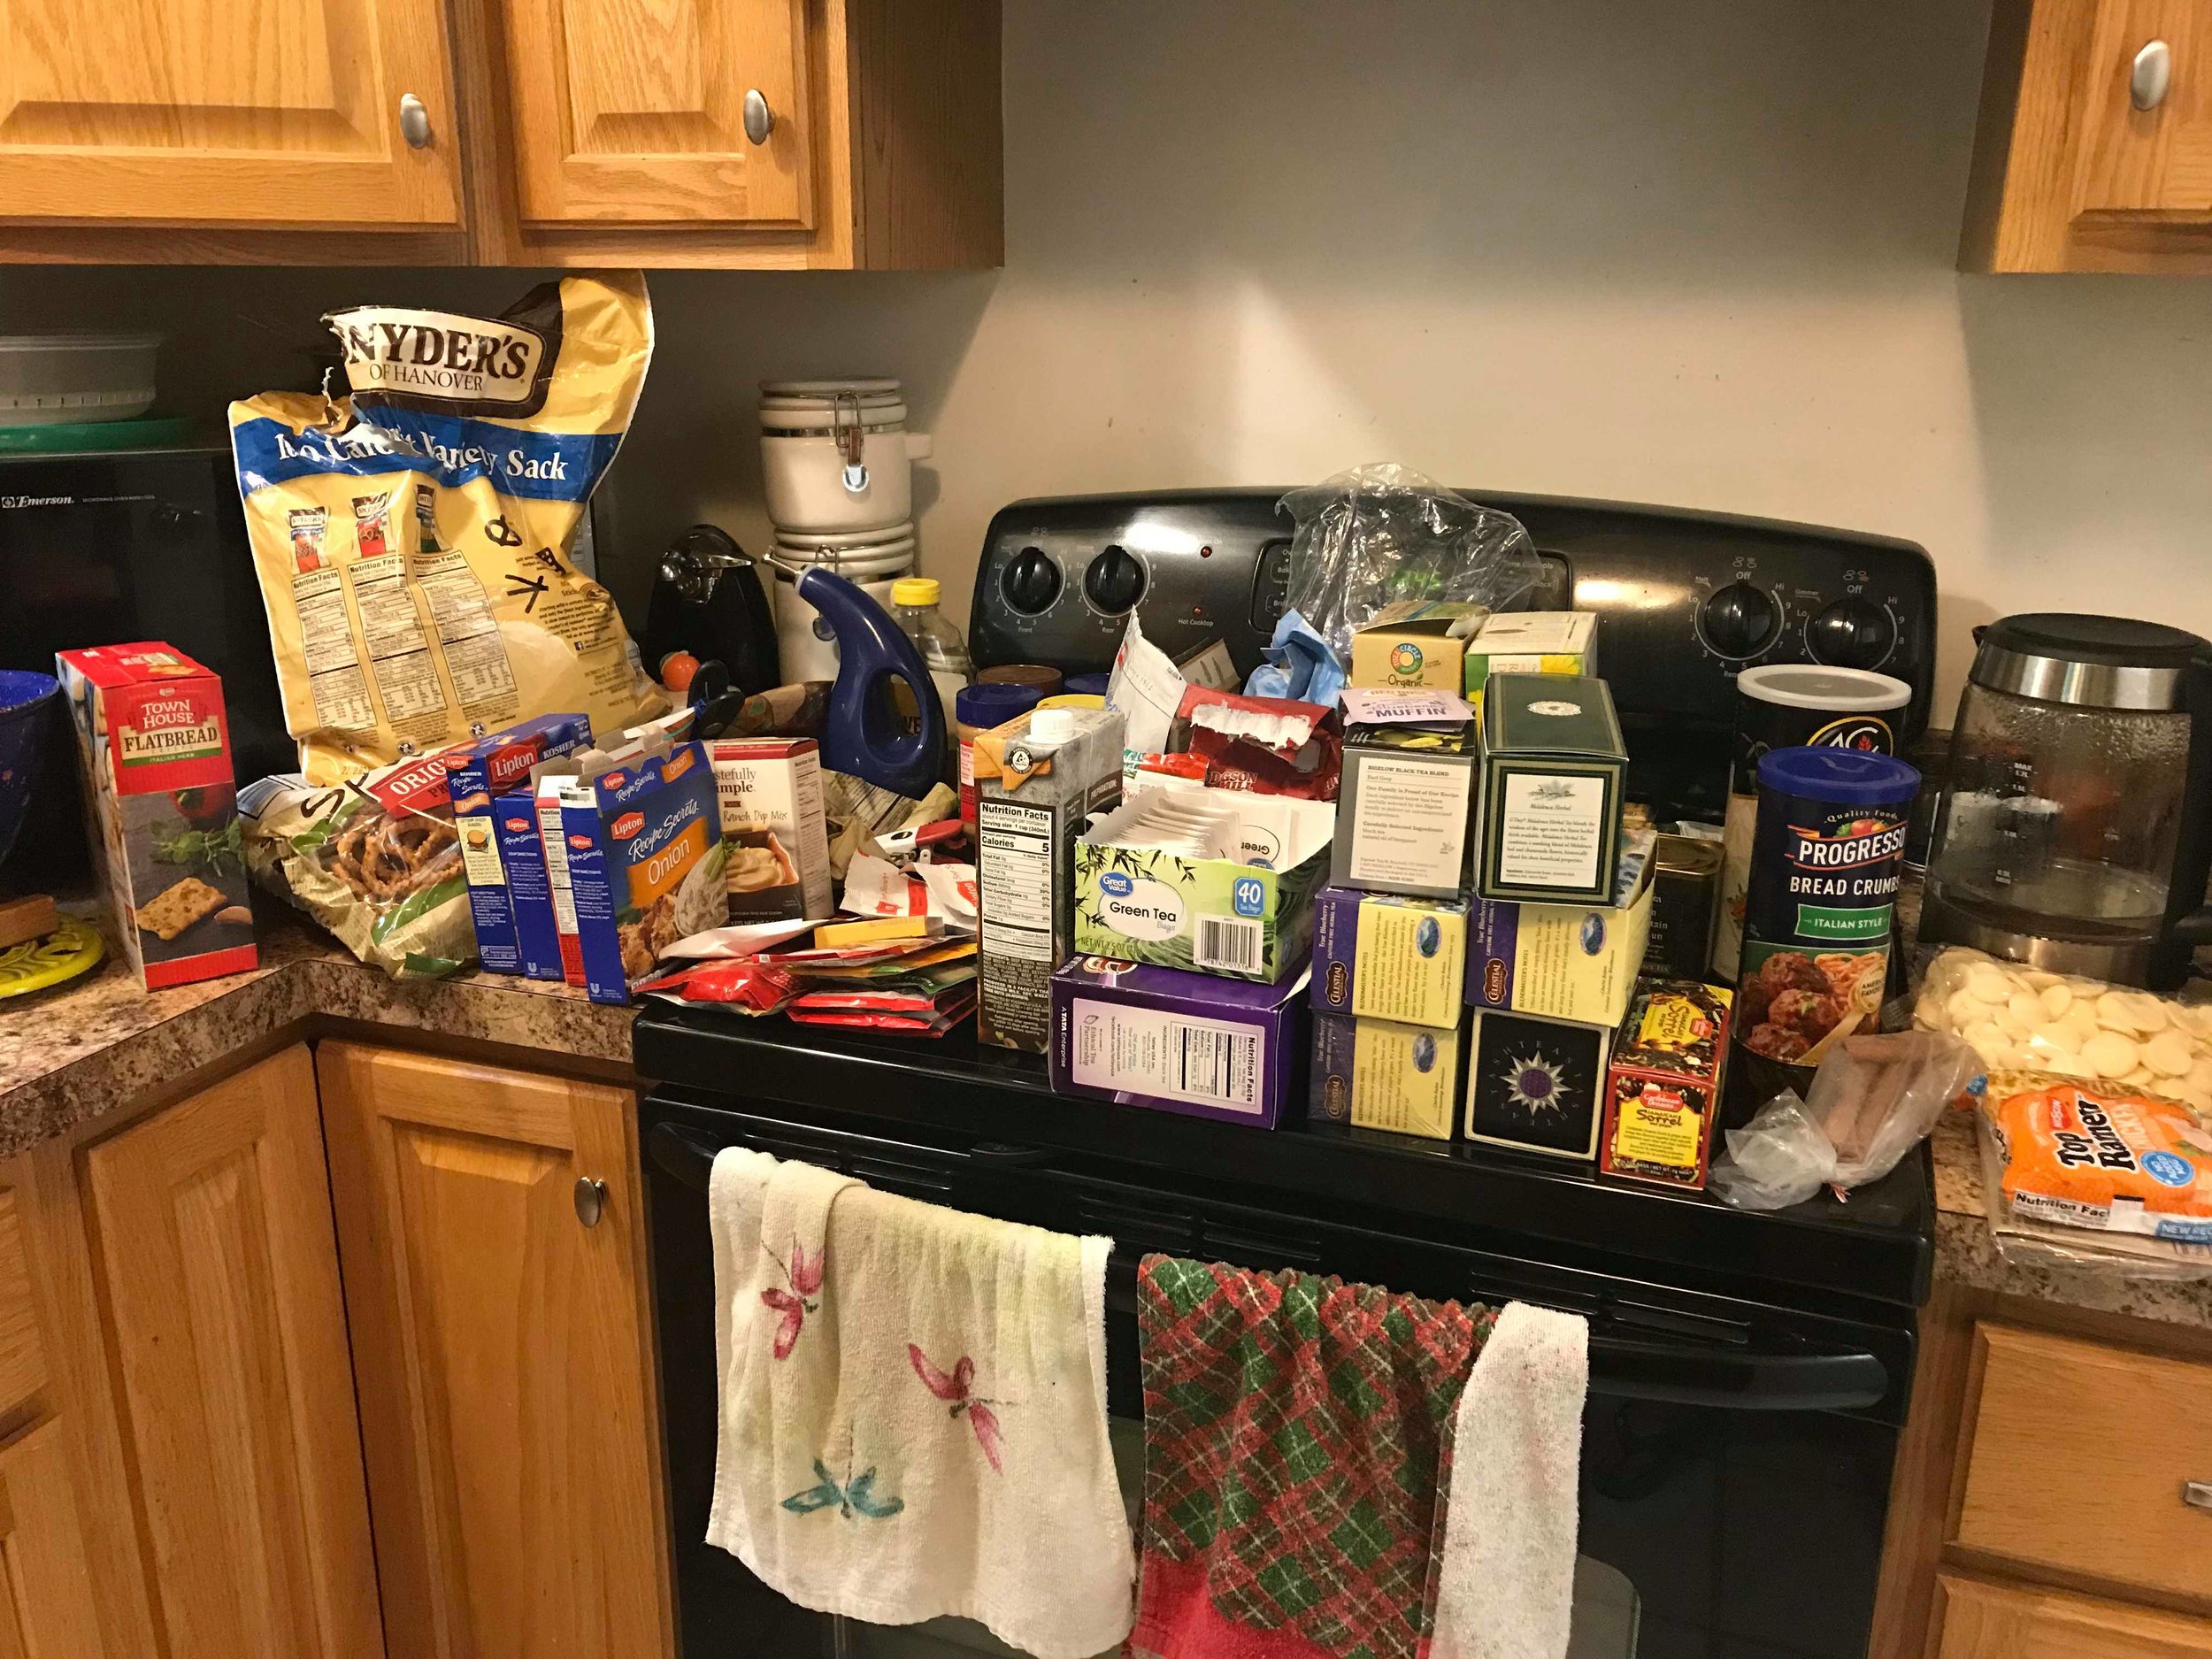
Once I had all my containers, my first plan of action was to pull everything out of the pantry.  I got rid of anything that had expired or that I felt I simply won’t use.  As a person who has been paying closer attention to their budget, it was eye opening to see the items that I had hidden in the hard to reach places that had expired.  NO MORE!  Next was to pull all individually packaged items out of their boxes.  I threw out those boxes and sorted everything into categories.  EX: granola bars, crackers, baking items, etc. This step was a little intimidating.  Our stove and part of our countertop was completely covered, but once I got started, I was on a roll.

Organizing this hot mess!

The next phase was to find the perfect container for each category.  Once that was established it was smooth sailing.  Everything now has its own little home.  Clear containers for easy visibility.  Everything is now grab and go.  This should make things easier to find for those husband eyes that can never seem to find anything.  I think this will also shave a few minutes off my morning prep time when I’m rushing to pack a lunch for work.  Even though it’s not necessary, I decided to make labels for each container.  This makes my crafting heart smile. 

Now for the reveal you’ve all been waiting for…… the before and after pictures.  It might still be a little busy but I’m very happy with the result.

Before and After
Ugh here’s my embarrassing before picture. Don’t judge!

Ugh here’s my embarrassing before picture. Don’t judge!

Another horrible before image.  Eeek
Here’s a proud after picture. :)

Here’s a proud after picture. :)

An organized pantry makes me happy. If you see where the tea is I have stacked two containers. Talk about a space saver!

An organized pantry makes me happy. If you see where the tea is I have stacked two containers. Talk about a space saver!

I LOVE these containers!

I LOVE these containers!

Here are my baking supplies tucked away in their new container home. :)

Here are my baking supplies tucked away in their new container home. :)

If you are interested in purchasing these containers for an organizing project of your own, I have provided a link to them below. Please note we may receive a small commission if you purchase using our link. I personally love these containers so far. I think they will serve a purpose for a long time and have certainly helped in taming the crazy pantry. If you have any questions please feel free to comment below. As always thank you for reading!

Personal reflection: It's OK if you aren't perfect.

Exhaustion.  Complete and total exhaustion.  That’s what I feel presently.  It’s difficult to wear so many hats constantly.  There are times where I simply don’t get everything done that I had intended, and I’ve learned to accept that’s OK.  It’s been hard to accept that at times, but it really is OK.  Even when I’m at maximum production, sometimes life happens and knocks you back a step or two.  When I’m feeling defeated, I must remind myself that I’m making great progress and have come pretty far from where I started. There are only so many hours in each day, and I feel that I have found a way to multi-task as much as possible to take advantage for every one of those hours.  To be clear, when I say multi-tasking, I have gone so far as to listen to podcasts or YouTube channels while I’m preparing dinner, working on orders, even taking a shower.  My hands might be busy, but I can still listen.  As a small business owner, taking on several roles, the materials I have found from podcasts and YouTube channels have been incredibly helpful.  I’ll take the risk of sounding quite old, but it really is amazing how much information is available online for FREE.


Some of you might be questioning, why let yourself get to the point of exhaustion??  Take a break!  Let it go! (Insert familiar song, singing, twirling and imaging snowflakes falling around you……. Ok brain, back to the topic at hand).  I do allow myself to take an evening off and from time to time, sometimes even a full Saturday or Sunday, but I have a goal that I want so badly.  Probably more than I have wanted anything, ever.  That goal is to have a successful business that will allow me to break free from “The Man”.  No, I don’t mean my husband, I would like for him to stick around.  I mean the 9-5 job where it seems no matter how much effort you put in, it’s the same sh*t, different day.


Because of the drive I’ve had over the last 18 months, my company is growing at what I consider a rapid pace.  I went from pretty much only making sales when I was set up at a local event, to daily sales.  I’m selling items as quickly as I can produce them and have now implemented pre-order sales with a current 3-5-week turnaround time.  Even though I’m attempting, words simply cannot express how happy this progress makes me.  Again, I’m not making millions, but I’m growing and learning so much at the same time.  I have money in my business account and can sit and look at a budget, make considerations on where my next investment should be made and finally run through ROI.  Yes, me a small business owner, is using terminology like ROI.  Some will roll their eyes at that comment, but I feel there are other entrepreneurs out there that will appreciate what I’m saying. 

I’m not a business major.  I don’t hold any IT certifications and yet I’ve been able to develop a website; cultivate a social media presence on multiple platforms; dive head first into becoming a blogger; push my creative abilities to the max, among many other areas that are required to carry my tiny little business.  It’s exhausting at times to work 14 to 16 hour days consistently, all while suffering from insomnia, but every order that goes out the door warms my heart and fills me with a great deal of excitement.  It’s true that you get what you put into something and I’m hoping that continues hold true.  I would love nothing more than for Frugal Fashionista to be my full-time job and perhaps even help other small business owners get on their feet and into a place of stability.  If you are an entrepreneur and would like to chat, feel free to email me and I’d be happy to share some of my failures and successes.  I’ll end my rant now, I guess I needed a release, and I’m finding that blogging may be a great outlet for that.  Until later, be safe and strive forward, you are awesome!